Free raspberry crochet pattern – Karla’s raspberries
Why is it called Karla’s fruit – Karla’s raspberries?
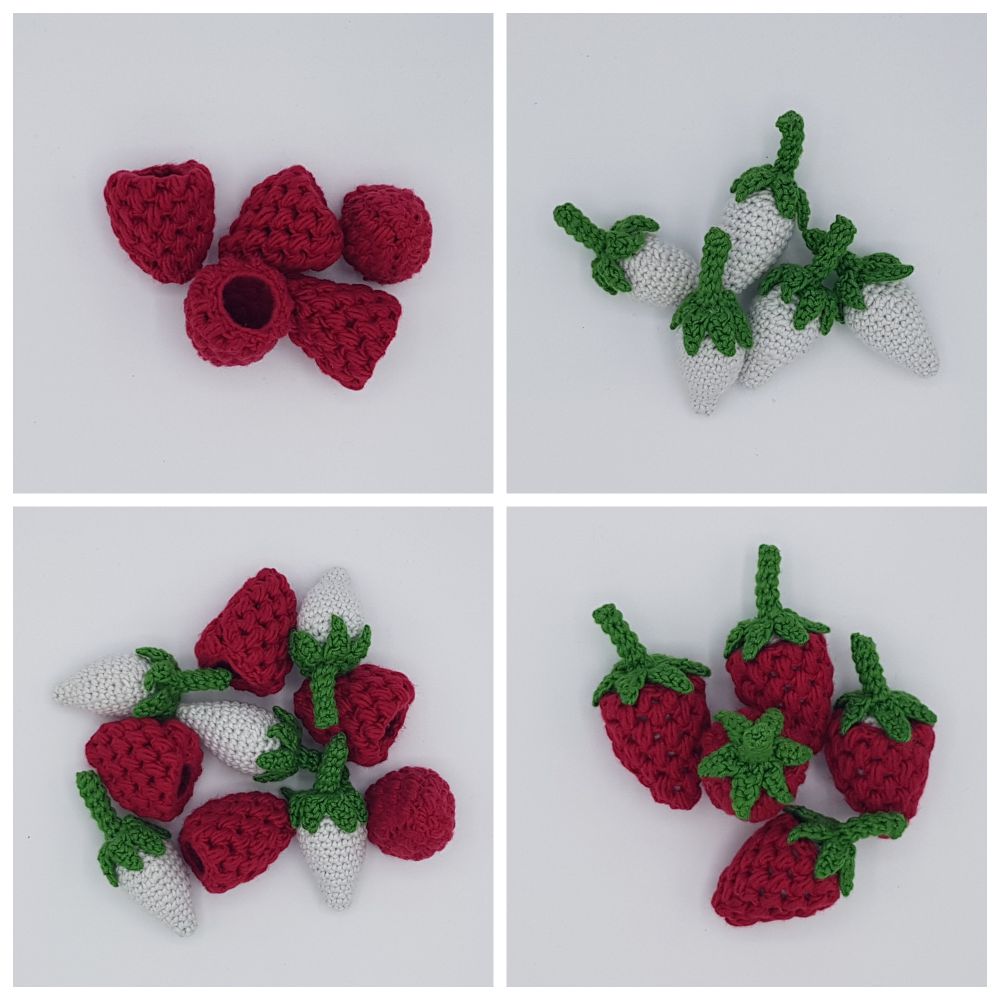
The designer, Thilde, made play food for her niece Karla's 2nd birthday. She thought that regular crochet berries were a little too ‘boring’, and she, therefore, tried to make them in several parts. Her idea was to make them more fun to play with, and here is the result: The crochet raspberries in the Karla Fruit series. The crochet raspberries are made from Infinity Hearts Rose 8/4 yarn, which is 100% cotton.
The crochet pattern is named after Thilde's niece, which is why it's called Karla's fruit. The series now consists of several exciting types of fruit, and there are most likely more on the way. We hope that you will show us how your raspberries turn out by using #ritokrea, #karlasfruit and #karlasraspberries.
Measurements
The raspberry measures 9 cm in circumference and is approx. 6 cm long, depending on how long you make the stalk.
Materials
- Crochet hook size 2.0 and 2.5
- Wadding
- Darning-needle for fitting/assembly
- (Possibly) place marker and row counter
- Infinity Hearts Rose 8/4 Yarn Unicolour 21 Bordeaux 27 g
- Infinity Hearts Rose 8/4 Yarn Unicolour 230 Pearl Grey 12 g
- Infinity Hearts Rose 8/4 Yarn Unicolour 156 Green 7 g
Abbreviations
dc – double crochet
ch – chain stitch
sl st – slip stitch
bobble – bobble stitch
dec - decrease (2 stitches together)
inc - increase (2 stitches in the same stitch)
htr – half treble
tr – treble
Unless otherwise specified, do a double crochet - dc.
Instructions
Introduction
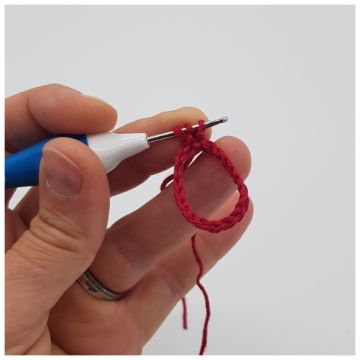
The raspberry is made using the bobble stitch, which is made like this:
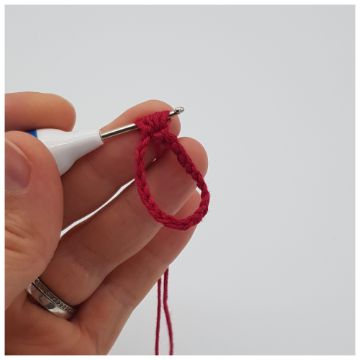
Wrap the yarn around the hook, insert the hook through the underlying stitch and pick up the yarn, make sure to tug on the yarn a little - yarn over and pick up a new thread in the same underlying stitch and pull on it– repeat one more time. So, a total of 3 times. You now have 7 stitches on your hook.
Yarn over and draw the hook through all 7 stitches on the hook and finish with a ch – you now have a bobble stitch.
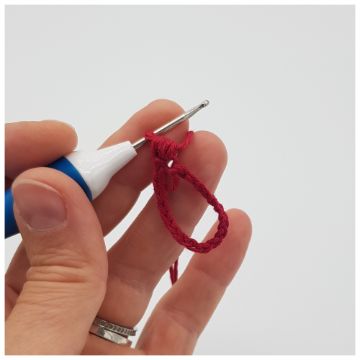
It is best not to crochet too tightly.
When doing decreases on the bobbles, you do this by crocheting 2 bobbles together. You only do yarn over twice on the hook instead of 3, and this is done in two turns – you now have 9 stitches on the hook, yarn over and draw the hook through all 9 stitches on the hook and continue.

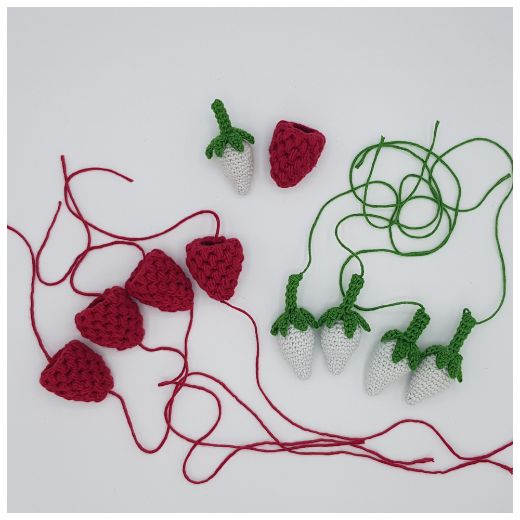
Raspberry
Hook 2.0 + 2.5 - colour: Wine red
Make 5 raspberries
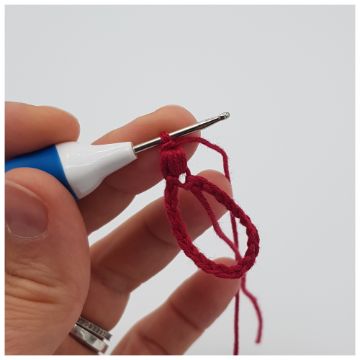
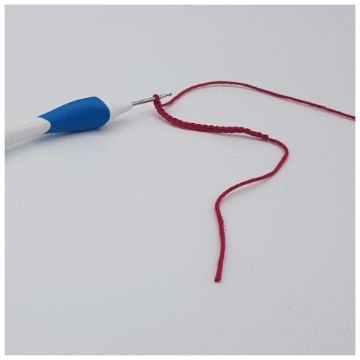
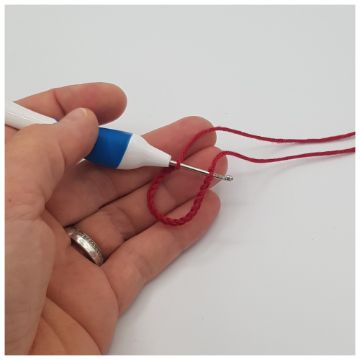
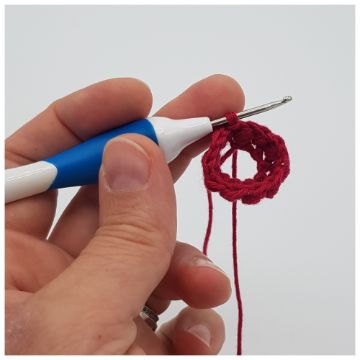
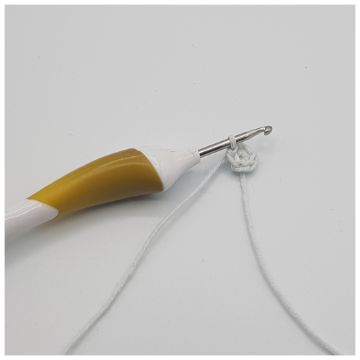
1. Rd. 20 ch on hook 2.5 – join with 1 sl st in first ch – the rest of the raspberry is made with hook 2.0
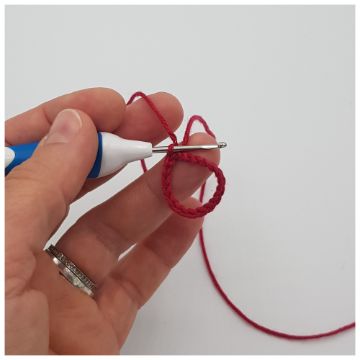
2. Rd. Make one round of dc, finish with sl st.
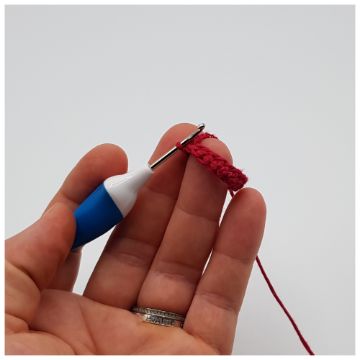
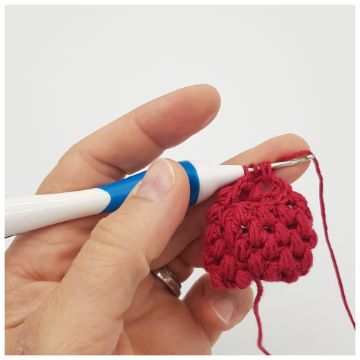
Start the next round by stretching the stitch slightly on your hook, so it measures approx. 0.5 cm – then crochet 1 bobble stitch in the stitch as sl st.
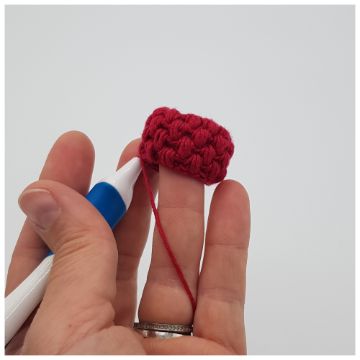
Now, crochet the bobbles in every other dc – make sure to always stretch the yarn so it measures approx. 0.5 cm.
Join the last bobble stitch with the first with a sl st after every round.
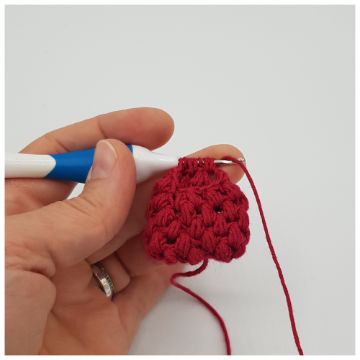
3 – 6. Rd. Make 4 rounds of 10 bobbles.
Start the first bobble in the next round in the space between the 1st and 2nd bobble from the last round.

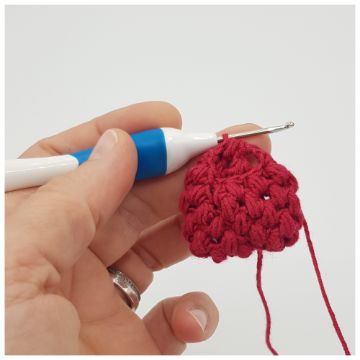
7. Rd. 3 bobbles, dec, 3 bobbles, dec (8 bobbles)
8. Rd. 2 bobbles, dec, 2 bobbles, dec (6 bobbles)
9. Rd. 1 bobble, dec, 1 bobble, dec (4 bobbles)
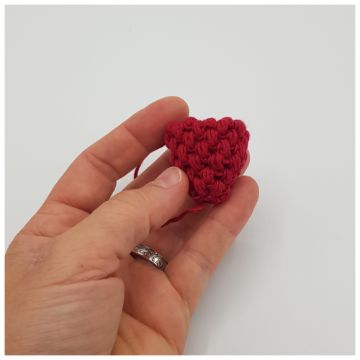
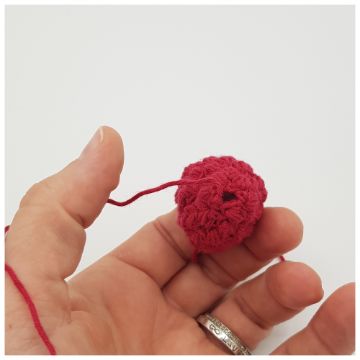

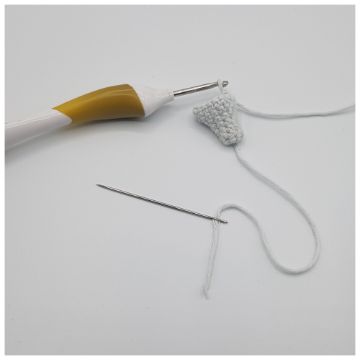
Weave the remaining stitches together and bind off.
The Stalk
Hook 2.5 – Colour: Pearl Grey and Green
Make 5 stalks, start with pearl grey
We now need to do spiral crochet.
1. Rd. 6 dc in magic ring
2. Rd. 6 dc
3. Rd. 1, inc x 3 (9)
4. Rd. 9 dc
5. Rd. 2, inc x 3 (12)
6. Rd. 3, inc x 3 (15)
7. Rd. 4, inc x 3 (18)
Weave in ends from the magic ring.
8.- 9. Rd. 18 dc (18)
10. Rd. 5, inc x 3 (21)
11. Rd. 5, dec x 3 (18)
12. Rd. 4, dec x 4 (15)
13. Rd. 3, dec x 3 (12) – stuff with fibre stuffing.
14. Rd. 2, dec x 3 (9)
Change to green on the last stitch.
15. Rd. 1, dec x 3 (6)
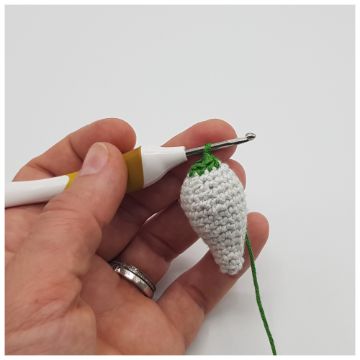
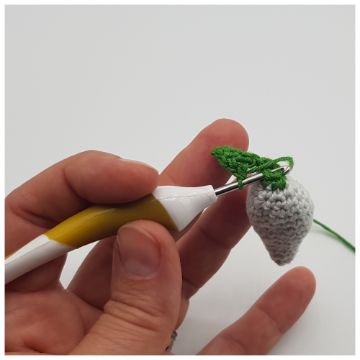
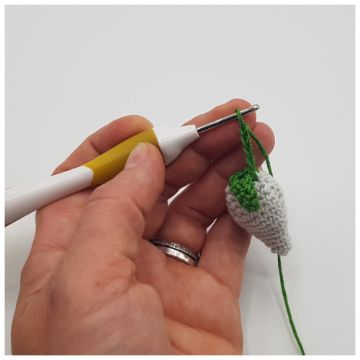
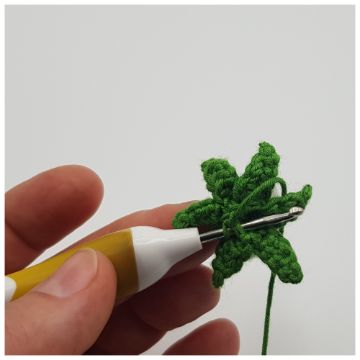
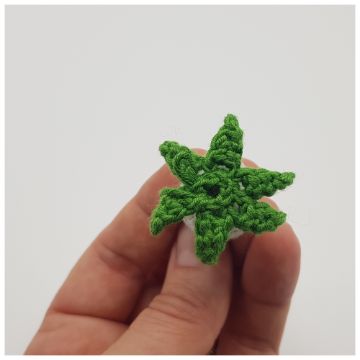
Weave in ends from the colour change – now, make the small leaves. Connect the leaves with the 6 stitches in rd 15.
16. Rd. 5 ch, in the 5 chain stitches you make: 1 sl st, 1 dc, 1 htr, 1 tr, sl st in next stitch.
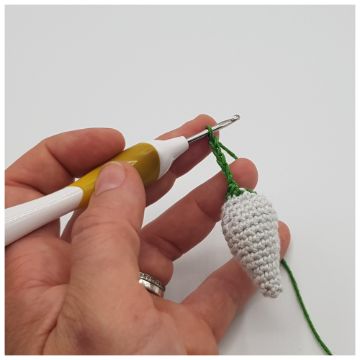
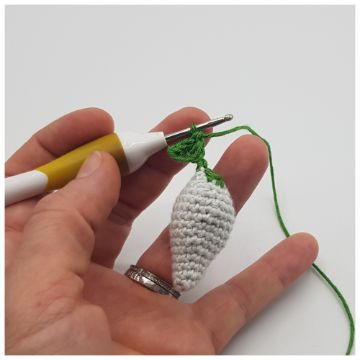
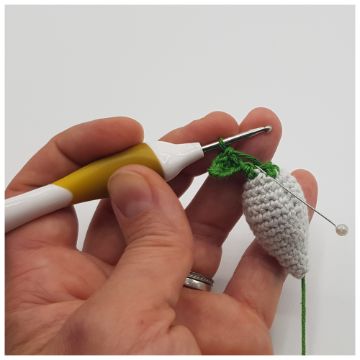
Repeat until you have made 6 leaves.
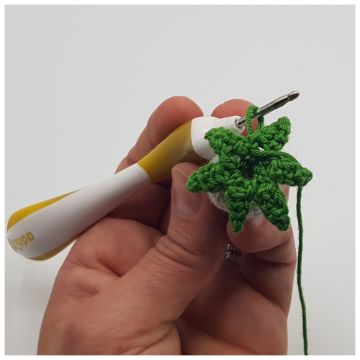
17. Rd. Make a dc in the underlying stitch – the stitch from rd. 15 (6)
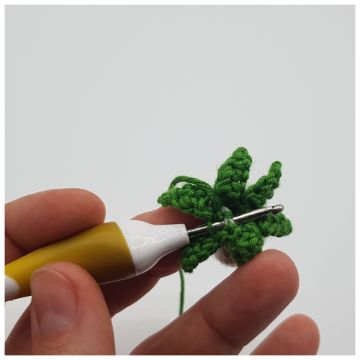
18.- 22. Rd. 6 dc – if you want, you can make the stalks different lengths.
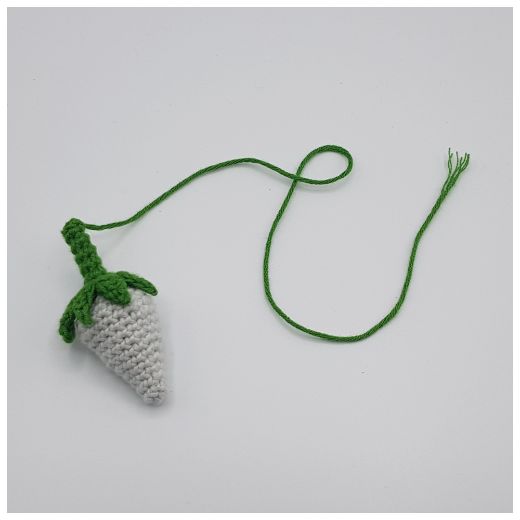
Finish with a sl st, weave in the ends and bind off.
You are welcome to share
If you try to crochet these lovely raspberries, we encourage you to share it on social media using the following hashtags:
#loverito
#ritokrea
#karlasraspberries
#karlasfruit
#madebyTanteT
Designed by: thildethordahl (Thilde Thordahl)
 Österreich
  Belgique
  Bosna i Hercegovina
  България
  Κύπρος
  Česká republika
  Danmark
  Eesti
Eesti  Føroyar
  Suomi
Suomi  France
  Deutschland
  Ελλάδα
  Kalaallit Nunaat
  Magyarország
  Ísland
  Ireland
  Italia
  Latvija
  Liechtenstein
  Lietuva
  Lëtzebuerg
  Malta
Malta  Isle of Man
  Nederland
  Norge
Norge  Polska
  Portugal
  România
  Slovensko
  Slovenija
  España
  Sverige
  Schweiz
  Ukraїna
  United Kingdom